this post will be used to exsplain that now we have footage in flash, the uses of it.
--------
this is the hardist part but the most inpropret.
i will be demstrating useing flash for frame by frame animation.
Saturday, 19 March 2011

Wednesday, 16 March 2011
Maya and Flash pt 2
Second post. We start work on the Flash side of this project.
-----------
I am using Flash CS4.
We'll start by using the footage we made with Maya. Open Flash and change the setting to 25 frames and the size of the canvass ____________. We need to do this first so the footage will run at the same time.
Then try to import the footage into Flash by going to file and import to libary. Try to bring the video straight in.
When we do this, we get a window giving us options of how we want to bring the footage in.
We now go back into Flash and go back into 'import to library' and this time chose the new file. Click 'ok continue' a few times and we have imported the video the way we need it for the tracing to work.
-----------
I am using Flash CS4.
We'll start by using the footage we made with Maya. Open Flash and change the setting to 25 frames and the size of the canvass ____________. We need to do this first so the footage will run at the same time.
Then try to import the footage into Flash by going to file and import to libary. Try to bring the video straight in.
When we do this, we get a window giving us options of how we want to bring the footage in.
- load external video with playback component
- embed FLV in SWF and play in timeline (the one we want)
- import as mobile device - video bundled in SWF
We now go back into Flash and go back into 'import to library' and this time chose the new file. Click 'ok continue' a few times and we have imported the video the way we need it for the tracing to work.
Sunday, 27 February 2011
Maya and Flash pt 1
Some shots are too complicated to be shown in 2d and even After Effects can't get everything right.
You going to have to sooner or later use 3d motion to get your point across. Maya is a good solution to this.
------
I'm only giving tips in this video. I'm not going to concentrate on any particular background or scene.
I'm working on my own model and expect that I can only really safely explain some of the basic modeling and animatic the camera shots.
-----
Basic modeling:
When you open Maya you can see the polygons options on the shelf.
Animating a camera and moving it:
We can easily make a camera by going to 'create' and 'camera'.
Moving a camera: click on the camera and click 'S' on the keyboard. This will make a keyframe on the time-line. Move the slider along the timeline and change the camera along the scene and click 's' again and create another keyframe. This gives you the Maya equivalent of a 'tween' (the filled animation between two key-frames).
You going to have to sooner or later use 3d motion to get your point across. Maya is a good solution to this.
------
I'm only giving tips in this video. I'm not going to concentrate on any particular background or scene.
I'm working on my own model and expect that I can only really safely explain some of the basic modeling and animatic the camera shots.
-----
Basic modeling:
When you open Maya you can see the polygons options on the shelf.
Animating a camera and moving it:
We can easily make a camera by going to 'create' and 'camera'.
Moving a camera: click on the camera and click 'S' on the keyboard. This will make a keyframe on the time-line. Move the slider along the timeline and change the camera along the scene and click 's' again and create another keyframe. This gives you the Maya equivalent of a 'tween' (the filled animation between two key-frames).
Working In Premier Pro
We have our images - now we are going to have to set them to time.
-------
Premier Pro,
Open Premier Pro.
Create a new project, name it (name)_animatic_001.
We take the png files we made and add them into the new project by dragging them into the library on the left.
Find any sound files you want, voices or extras and also add them.
N.B. Keep it organised in the library by using files and naming them.
Drop the images as well as any sound you're using into the timeline.
Strech the background so it fits the screen on the top left.
You should keep the backgound on the bottom layer and the images of your character on top in the time-line. This is why we cut them out. We can now move them freely around the screen over the background and animate them easily.
We animate them by clicking on the image and opening the motion box. We get all the options we need to animate;
This should be enough to get you started in Premier Pro.
-------
Premier Pro,
Open Premier Pro.
Create a new project, name it (name)_animatic_001.
We take the png files we made and add them into the new project by dragging them into the library on the left.
Find any sound files you want, voices or extras and also add them.
N.B. Keep it organised in the library by using files and naming them.
Drop the images as well as any sound you're using into the timeline.
Strech the background so it fits the screen on the top left.
You should keep the backgound on the bottom layer and the images of your character on top in the time-line. This is why we cut them out. We can now move them freely around the screen over the background and animate them easily.
We animate them by clicking on the image and opening the motion box. We get all the options we need to animate;
- postion: where the image or video is on the screen
- size: how big the image or video is on screen
- rotation: turing the image or video by the pivot point
- anchor point: the pivot point on the image
- opacity: degree of transparency
This should be enough to get you started in Premier Pro.
Editing in Photoshop
Now that we have the images we are going to need, cut each of them out.
-------
I had made video tutorial by recording my screeen and commentating over it as I went.
Go into photoshop and open the scanned image of your storyboard.
This is about the third try to upload the video. The first one didn't have sound, the second wasn't hd and the third seemed ok, so yeah. :D
Here is a list of what I have done - in case you didn't realise what I did.
Open Photoshop;
Scan in images and open in Photoshop;
Find the sizes of the panels you need by first saving the first page a second time as panel one, then crop 'til the canvas fits the first panel.
Save, then scroll the page over to the left 'til the second panel is where the first panel was, then resave as panel two.
Continue 'til each panel is split up in its own file.
Open the new files and add a blank background. Cut out the figure from the background by first going over it with the eraser tool and then the remainder of the background with the wand tool.
After you have cleared the background, trim the image by going to image/trim. This will bring the border right up to the figure. If it dosn't, then add in a stroke to reveal any missed sections.
Clear them, then retrim.
The character is now cut out. Save as a png so you keep the background trasparent and move on to the next post for more instructions.
-------
I had made video tutorial by recording my screeen and commentating over it as I went.
Go into photoshop and open the scanned image of your storyboard.
This is about the third try to upload the video. The first one didn't have sound, the second wasn't hd and the third seemed ok, so yeah. :D
Here is a list of what I have done - in case you didn't realise what I did.
Open Photoshop;
Scan in images and open in Photoshop;
Find the sizes of the panels you need by first saving the first page a second time as panel one, then crop 'til the canvas fits the first panel.
Save, then scroll the page over to the left 'til the second panel is where the first panel was, then resave as panel two.
Continue 'til each panel is split up in its own file.
Open the new files and add a blank background. Cut out the figure from the background by first going over it with the eraser tool and then the remainder of the background with the wand tool.
After you have cleared the background, trim the image by going to image/trim. This will bring the border right up to the figure. If it dosn't, then add in a stroke to reveal any missed sections.
Clear them, then retrim.
The character is now cut out. Save as a png so you keep the background trasparent and move on to the next post for more instructions.
Friday, 4 February 2011
Drawing Out
A few notes for when you come down to drawing a storyboard.
Must take into consideration when producing the animatic:
What it says in the script - Keep in mind if you’re working off a script you didn’t write yourself: you will have to work closely with whoever did. You are not going to be able to imagine it perfectly so mistakes are bound to happen and will have to redraw them later.
How much time it has to go on for - You are expected to keep to a time limit - this is in both the sense of how long the film will last and how long you're got to do it.
Time and build up - Carrying on from the last paragraph; when working with a story and plot, you are expected to create a feeling of anticipation.
Subject - who is in it. You’ve got to show were the eye takes you.
What’s happening and going to happen – again, you need to take the plot into consideration when drawing each frame out. To save time you might want to draw the background separately and edit it back in when it comes to working on the digital side and then draw the protagonist or moving subject if you know he'll have a lot of shots in the same place.
Camera angles - A camera shot can make all the difference to a film. (example?) And in the animatic you need to sort where the camera is going to go early on.
Background/foreground - you don’t have to draw the same background with every panel. You can draw it out and bring it in when it comes digital. Keep working on the characters and save as much time as you can with out affecting the overall shot.
- distance-
Lighting - night or day, light is going to affect a scene. You can get away will the odd shadow here and there but mostly you will have to show …
But remember don’t spend too much time working on the storyboards - ironically, the best thing you can do get them done fast. Set yourself a short deadline. Then take the rest of the time perfecting them or making changes to what doesn’t seem right.
--------
example of what i'll be useing to show you diffrent methords for storybordsing
using refrences


if somthing in the script reminds you of another cartoon or story you've seen befor, dont beafrade to use it as insprations or refrence to help you.
Must take into consideration when producing the animatic:
What it says in the script - Keep in mind if you’re working off a script you didn’t write yourself: you will have to work closely with whoever did. You are not going to be able to imagine it perfectly so mistakes are bound to happen and will have to redraw them later.
How much time it has to go on for - You are expected to keep to a time limit - this is in both the sense of how long the film will last and how long you're got to do it.
Time and build up - Carrying on from the last paragraph; when working with a story and plot, you are expected to create a feeling of anticipation.
Subject - who is in it. You’ve got to show were the eye takes you.
What’s happening and going to happen – again, you need to take the plot into consideration when drawing each frame out. To save time you might want to draw the background separately and edit it back in when it comes to working on the digital side and then draw the protagonist or moving subject if you know he'll have a lot of shots in the same place.
Camera angles - A camera shot can make all the difference to a film. (example?) And in the animatic you need to sort where the camera is going to go early on.
Background/foreground - you don’t have to draw the same background with every panel. You can draw it out and bring it in when it comes digital. Keep working on the characters and save as much time as you can with out affecting the overall shot.
- distance-
Lighting - night or day, light is going to affect a scene. You can get away will the odd shadow here and there but mostly you will have to show …
But remember don’t spend too much time working on the storyboards - ironically, the best thing you can do get them done fast. Set yourself a short deadline. Then take the rest of the time perfecting them or making changes to what doesn’t seem right.
--------
example of what i'll be useing to show you diffrent methords for storybordsing


using refrences


Monday, 31 January 2011
Storyboarding
First you will need to get the script and transfer text into images.
I am going to start right at the beginning. We are going to draw out what’s going to happen in different panels on storyboards templates.
-----------
You can get templates on the internet such as these, I found just by typing in 'storyboard templates' into Google.
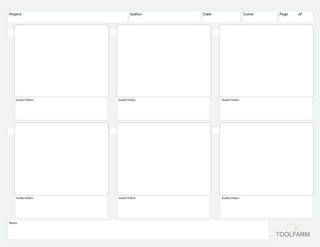

Images were taken from other websites.
Using templates will save a lot of time but if you don’t have a printer or would like the more personal touch to the storyboards like I do, then I suggest using a pencil and ruler and draw it out on A4 paper like in the good old days. I’ve set up how I like to lay out my storyboards. This does have more room for drawing but a lot less for text.

Used Photoshop to make this template, used this as a guide on paper.
Feel free to print this as it is not copyrighted from other websites.
Now that we have our templates we can begin drawing!
I am going to start right at the beginning. We are going to draw out what’s going to happen in different panels on storyboards templates.
-----------
You can get templates on the internet such as these, I found just by typing in 'storyboard templates' into Google.

Images were taken from other websites.
Using templates will save a lot of time but if you don’t have a printer or would like the more personal touch to the storyboards like I do, then I suggest using a pencil and ruler and draw it out on A4 paper like in the good old days. I’ve set up how I like to lay out my storyboards. This does have more room for drawing but a lot less for text.

Used Photoshop to make this template, used this as a guide on paper.
- red v 20cm
- red H 27cm
- green V 6cm
- green H 9cm
- yellow and orange 0.5cm
Feel free to print this as it is not copyrighted from other websites.
Now that we have our templates we can begin drawing!
Subscribe to:
Posts (Atom)